
Toolbar
The toolbar keeps common writing actions near the editor, so you can insert Markdown structures without memorizing every syntax detail. Button order and visibility can be adjusted in Settings.
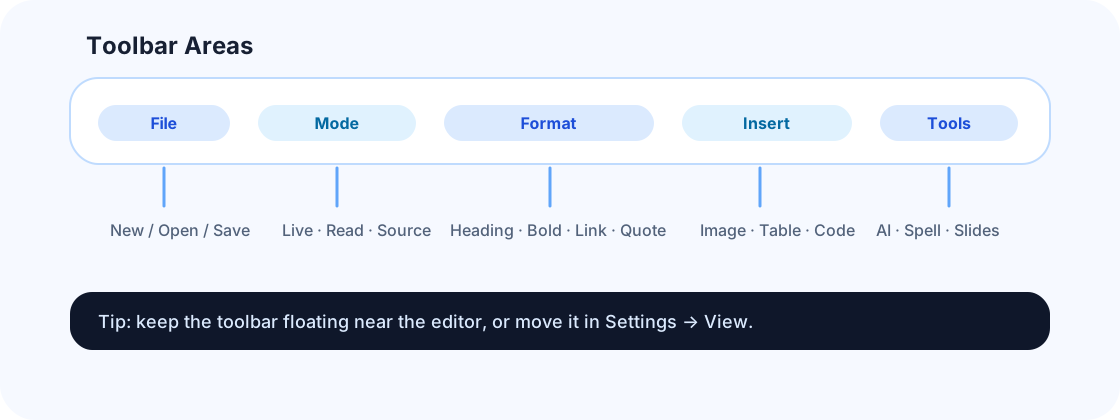
Main areas
| Area | Common actions | Best for |
|---|---|---|
| File | New, open, save | Starting or switching documents |
| Mode | Live, Read, Source, split view | Moving between editing, reading, and source control |
| Format | Heading, bold, italic, strike, quote, link | Paragraph and inline formatting |
| Insert | Image, table, code block, divider, wiki link | Structured content and local document links |
| Tools | Version history, snippets and templates, spell check, AI assistant, presentation mode | Snapshot comparison, reusable structures, review, assisted writing, and slides |
Key buttons
| Button | What it does | Best for |
|---|---|---|
| Heading dropdown | Switch between H1-H6 and paragraph | Adjusting long-document hierarchy |
| Ordered-list style | Choose decimal, alpha, or roman numbering | Steps, outlines, and policy-style lists |
| Table grid | Drag to choose rows and columns | Creating small tables quickly |
| Wiki link | Insert a wiki-style document link | Connecting notes in the same folder |
| Version History | Open local snapshots, then create, compare, or restore versions | Checking changes and recovering older content |
| Snippets & Templates | Insert built-in templates or personal Markdown snippets | Repeated structures like meeting notes, tech notes, and reading notes |
| Spell check | Open the writing-quality panel | Mixed Chinese / English proofreading and duplicate cleanup |
| Presentation mode | Present the current Markdown as slides | Split pages with --- before presenting |
Version diff buttons
After selecting a snapshot in “Version History”, the comparison view shows addition / deletion counts and provides:
- Previous diff: jump back to the previous added or removed line.
- Next diff: jump to the next added or removed line.
- Position: show the current diff index and the total number of navigable diffs.
For long documents, use these buttons to locate changes first, then decide whether to restore the snapshot.
Customize layout
Open “Settings → Appearance → Toolbar layout” to:
- Drag buttons to change order.
- Move low-frequency buttons to the hidden area.
- Place buttons into Format, Block, Insert, or Utility groups.
- Move separators so common actions are visually grouped.
Floating toolbar
By default, the toolbar stays close to the editor. If you prefer a fixed layout, adjust toolbar position and display in Settings.
TIP
The toolbar is a shortcut, not a replacement for Markdown syntax. Once you know the syntax, type Markdown directly and use the toolbar for high-frequency actions like images, tables, links, and version snapshots.